Saturday, April 24, 2010

Easter Crackers


Here are a couple of little Easter crackers I made for the girls to give to their teachers at Easter.
I cut them out with my cricut, filled them with Easter eggs and tied them up with ribbon, I cut out the little chickens and decorated them with gel pens etc, this was a quirky way to send them to school:-)

2 more Birthday cards


My daughter has 2 Birthday Parties this weekend, both girls were turning 10 so I had to quickly make a couple of simple cards for her to give them.
I used my cricut with my new cricut pens, they outline the paper before cutting it, I like the look they gave to the butterfly.
I inked the edges and stamped the flourishes in the corners, stuck on a few rhinestones then used a happy birthday sticker to finish it off. I also added a few transfers inside the card but didnt get to photograph this;-(


I made the 2nd card with a cricut frame and flower (edged with the cricut ink pens), added some ribbons, rhinestones and stickers, also decorated the inside a little but again didnt photograph it;-(
these were fun easy cards to make, nicer than giving a shop brought one:-)

NZ Art Guild Collaborative Piece


I have just finished a piece for the NZ Art Guilds Collaborative Piece.
64 artists from around NZ participate in a combined piece which gets auctioned off and 100% of the proceeds go to The Mental Health Foundation.
We each get a basic pre-painted background and we and are free to interpret a common theme in our own way, (this years theme was new beginnings/growth)
Here is my piece -
My piece represents the Metamorphosis a Butterfly goes through, with a big fat caterpillar inside a clock - and the words, "Time changes Everything" I also added a chrysalis as part of the change that takes place.

Thursday, April 15, 2010

Thankyou Card


Hi de hi, I made this Thankyou Card for the kids Grandad as he spoiled them with some Easter Eggs.
Unfortunately the photo didnt come out very good and you cant see the gold along the bottom of the card or the chalks on the trout.
I was a little stumped on what to make for a male, but I was reasonably happy with this, simple but nicer than a shop card:-)
I used my cricut for the fish and the words, stamped the background, used chalks and gel pens on the fish, inks around the card and real gold along the bottom.
This was fun to do, Im enjoying making cards for people, gives that personal touch:-)

Thursday, April 8, 2010

First Card with my new Cricut.


McKenzie had a birthday party to go to (another Erin) and I wanted to make the card with my new Cricut machine... Didnt really know where to begin:-)
this took me half the day, but I got there in the end (just as well I had plenty of time:-)
I brought the sure cuts alot programme which means I dont need all the cartridges, it is fantastic.
My daughter was very happy with the card.
Even though it took me ages I really enjoyed playing around:-)

Tuesday, March 2, 2010

Nathalia and I create a card:-)

Nathalia had a friends birthday party to go to so we decided to try making her a card. Here is our attempt.
I think Nathalia did a pretty good job considering shes only just turned 8. 
She helped until her bedtime then I finished it up.
I think her little friend was happy with her card:-) I will definitely do this again.
I am very excited to have brought a cricut this week, just waiting for it to arrive now. I havent even tried one but they look like fun, so no doubt once Ive learnt the ropes I will be posting some of my creations I make.
Thank goodness I have a supportive hubby who lets me spoil myself:-)


Nats card:-)

Inside View.

Thursday, February 18, 2010

Whats on the Easel?


Penelope longed to be Graceful.

Here is an update on what Ive been painting this last week or so. Again more butterflies:-)
I decided to go a little random and include papers, dripping etc I love paintings with the drip effect:-)
I made this ever so cute bird from papers and added her in, her name is Penelope and she is learning how to be graceful - just as the butterflies are:-)
This kinda looks a little shabby chic.
Hope you like it:-)

Metallics Challenge


Here is my entry for Inkurable Stampers February Challenge, Metallics.
I was a little hesitant to submit this as it looks rather plain compared to some of the fab entries but I thought what the heck! its all a learning curve:-)
I stamped gold clock faces on black card, then meticulously painted the hands off old watches, gold. Glued them on to the faces.
Cut a piece of foil type stuff and joined that - along with a stamped butterfly (on gold metallic paper) to my card. I used brads which I painted to look aged and also painted faux rusting.
I used gold stickers for the word dream then added acrylic ageing to them.
My butterfly is stamped them I used chalks and coloured pencils to emphasize it.
My photos dont show the depth very well, I tried many times to take a good shot but to no avail so this will have too do;-)
Thanks for stopping by:-) Helen
http://inkurablestampers.blogspot.com/

Wednesday, February 17, 2010

Gothic Arch 3 - Prince Charming close up

A close up of my toad wearing his Crown

Gothic Arch 3, Prince Charming


Gothic Arch 3, Kiss Me
Originally uploaded by Sherrox


This is my gothic arch for the crown challenge.
I decided to use this cute little toad adorned with a crown as my stamp.
I have tried various techniques on this card, trying to extend my knowledge a little with stamping etc.
I glued a paper background onto my base card, I inked around the edges.
I stamped the writing and lips on white card, then coloured them in with luminarte (I think theyre called, twinkling h20's)
I coloured the toad with watercolor pencils and twinkling h20's.
I painted a piece of embossed paper black then stamped the gold highlights over it. Which I stuck below the heart.
The girl is stamped then framed, coloured using watercolour pencils, h20's and ink.
I stuck on buttons with embroidery cotton attatched and painted the cotton in h20's.
I used a sticker (make a wish) to make a tag with a glitter edge and finally stamped 2 large kisses on the background.
This was lots of fun:-)

Saturday, February 6, 2010

Gothic Arch 2 Free to Soar

And my Paper Art Doll


Here is the 2nd Gothic Arch.

Welcome to my new blog:-)


Well I have finally taken the computer world by the horns and decided to start my own blog - shudder:-)
Keen to participate in various challenges on the internet but nowhere to showcase them, so a blog it is:-)
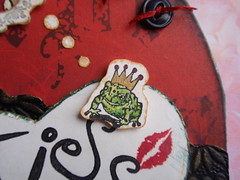
I have just started playing around with stamps.
I brought this gorgeous set of darkroom door butterfly stamps, and in my search of the internet to see what they stamped like (prior to purchasing) I found Inkurable Stampers. Keen to participate in their challenges I decided to give stamping a go.
I started out by making a gothic arch for their Gothic Arch challenge. Each fortnight a new theme is announced, the 1st theme for 2010 was butterflies (which by this time I had purchased) So I decided to make my first gothic arch titled Butterfly Boogie, That was fun:-)
Every piece has to contain at least 1 stamp, well that was easy to do - I had a tin full of them:-)
I enjoyed that so much I made a 2nd arch titled, Free to Soar.
Inkurable Stampers is also running a monthly theme, Januarys Theme is Paper Art Dolls. I couldnt NOT give that a go so I quickly whipped up a pussycat doll. I only had till the 6th of Feb so I had to work quickly. I didnt have a doll face stamp so I used a cat face stamp - hence she became the pussycat dolls:-)
Once Ive worked out how to add photos of these I shall upload some.
Im looking forward to the next challenge and enjoying the stamping/crafting.
Thanks for popping in
x Helen:-)